
Get new clients
Landing pages
Build a public page that introduces your practice and lets new clients sign up, without a website of your own.
A landing page is a public web page you can share anywhere: on your website, in a newsletter, in a social post or in a message. Visitors read about you, fill in a short form and arrive in your workspace as clients. You don’t need a website, and you don’t have to invite anyone by hand.
Think of one page per offer. Sarah Bennett has a page “Free 20-minute intro call” for people who want to try coaching, and a page “Mindfulness group: autumn intake” where people sign up for the next group. Everyone who signs up on the group page lands on her waiting listWaiting listWhere signups from a landing page wait until you accept them, for example when a group has limited places., and she accepts them once she has talked to them. See Signup form.
Owners, Managers and Members can create landing pages. How many pages you can have depends on your plan:
- Spark: not included
- Growth: 1 page
- Impact: 3 pages
- Collective: 5 pages
- Beyond: unlimited
The free trial includes one landing page. When you reach your limit, New page asks you to upgrade instead of opening the editor. See Plans and pricing.
Start a new page
Section titled “Start a new page”Your pages are under Growth → Landing Pages in the left menu, with their status: Draft or Published. Click New page to start one, then click Untitled landing page at the top and type a name.
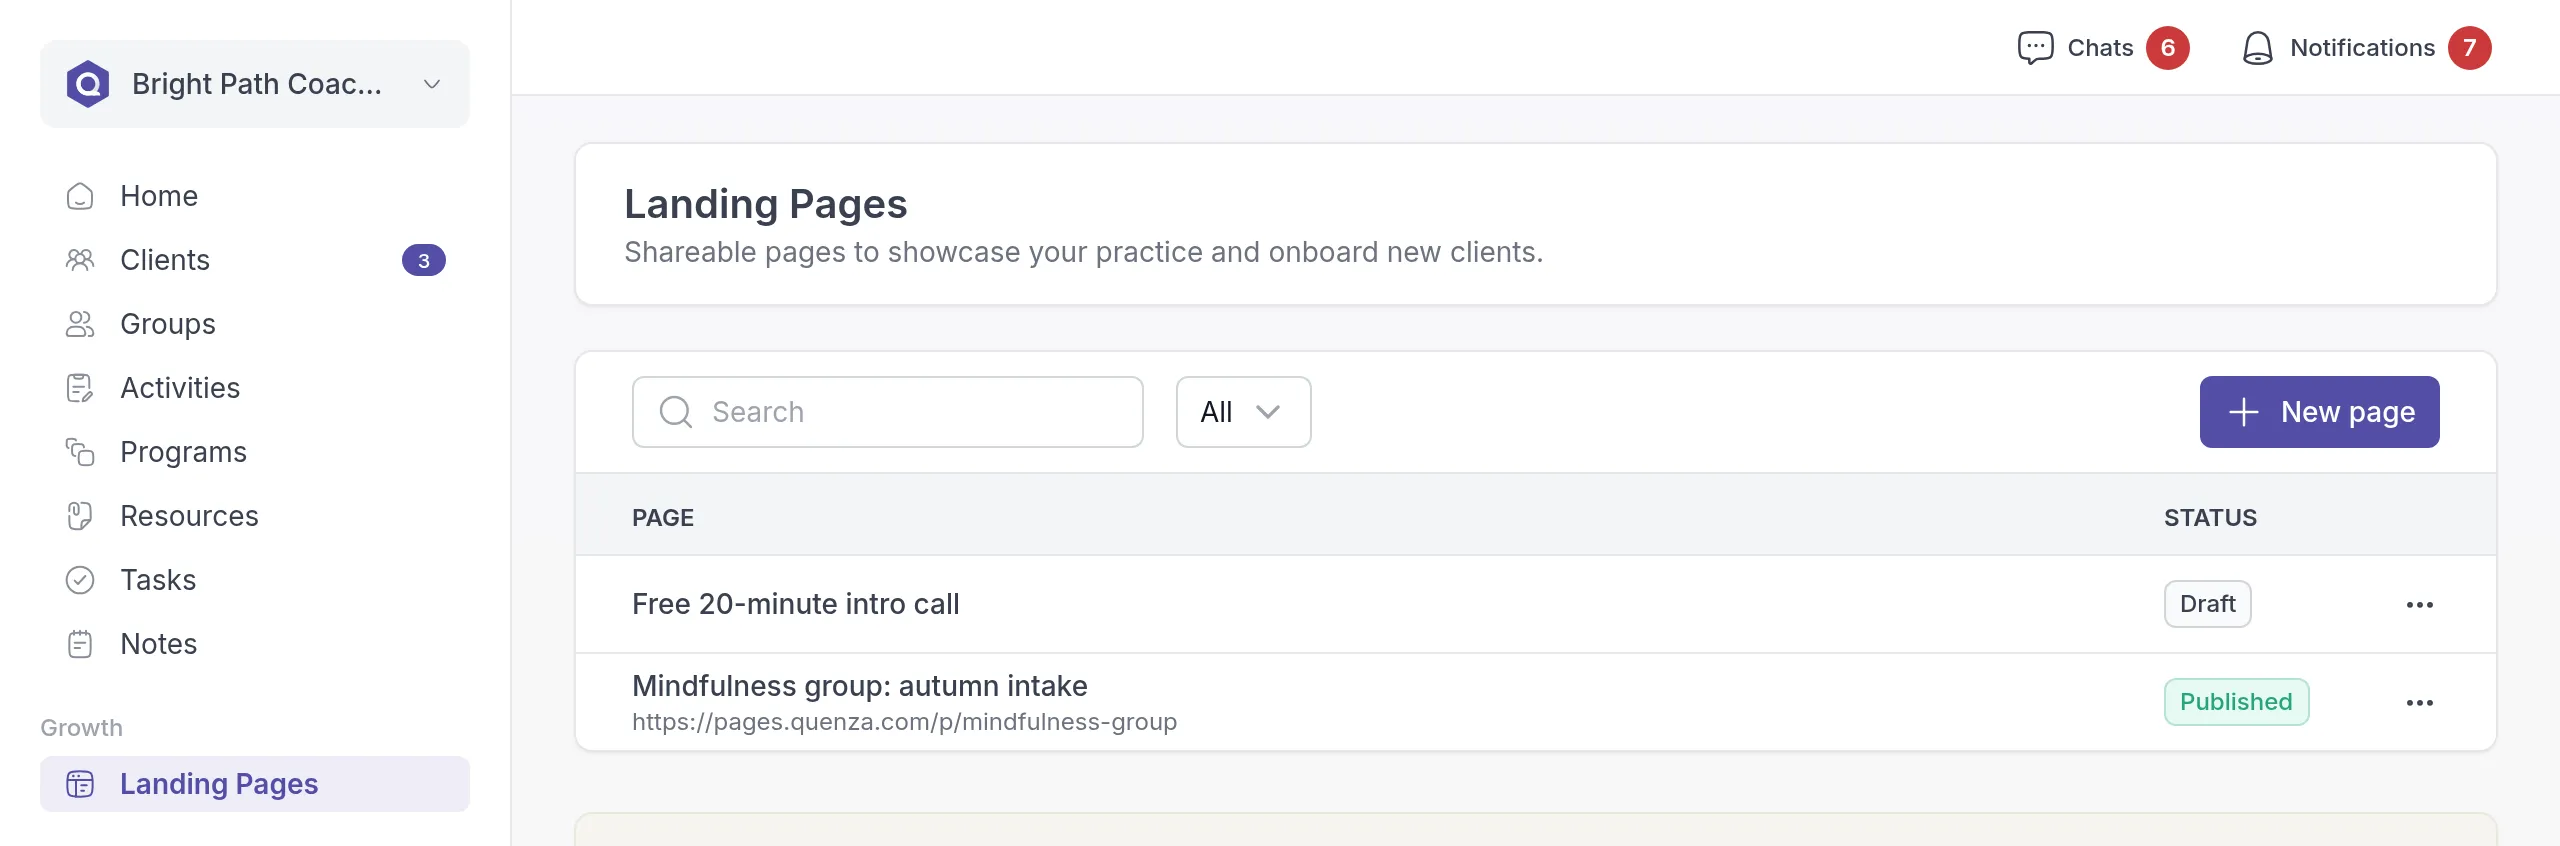
Visitors see the name in their browser tab and in link previews, and it appears in the emails they receive after they sign up. Pick a name they will recognise, such as “Free 20-minute intro call”.
Add content
Section titled “Add content”You build the page on the Content tab from blocks, called elements. Click Add element, pick an element and fill in its settings. Repeat until the page says what you want.
There are five elements:
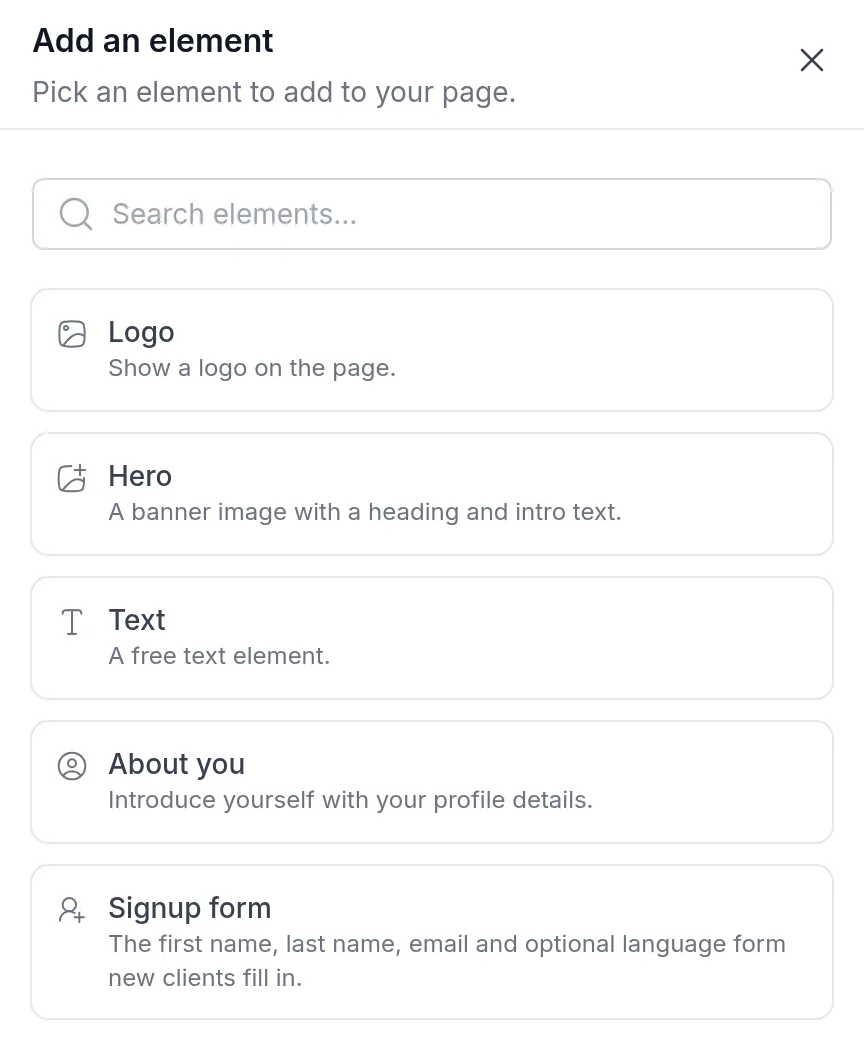
- Logo shows a logo at the top of the page. It uses your workspace logo, or you can upload a different one.
- Hero is a banner image with a heading and a short intro text.
- Text is free text for anything else you want to say, such as what a first session looks like or where you work.
- About you shows the profile of a professional in your workspace, with their bio, company and website if you want.
- Signup form is the form visitors fill in to become your client. See Signup form.
A simple page often has a hero with a clear heading, a few lines of text, About you and the signup formSignup formThe form on a landing page that turns a visitor into a client. You choose what it asks and whether people join straight away or wait for your approval.. To change an element later, click it. Hover over an element to duplicate or delete it, or to add a new element above or below it. Drag an element by its handle to move it.
Choose the page address
Section titled “Choose the page address”On the Settings tab, under Page URL, type the last part of the address, for example free-intro-call-with-sarah. When you click outside the field, Quenza checks the address and shows Available or Not available. Use the copy button next to the field to copy the full address.
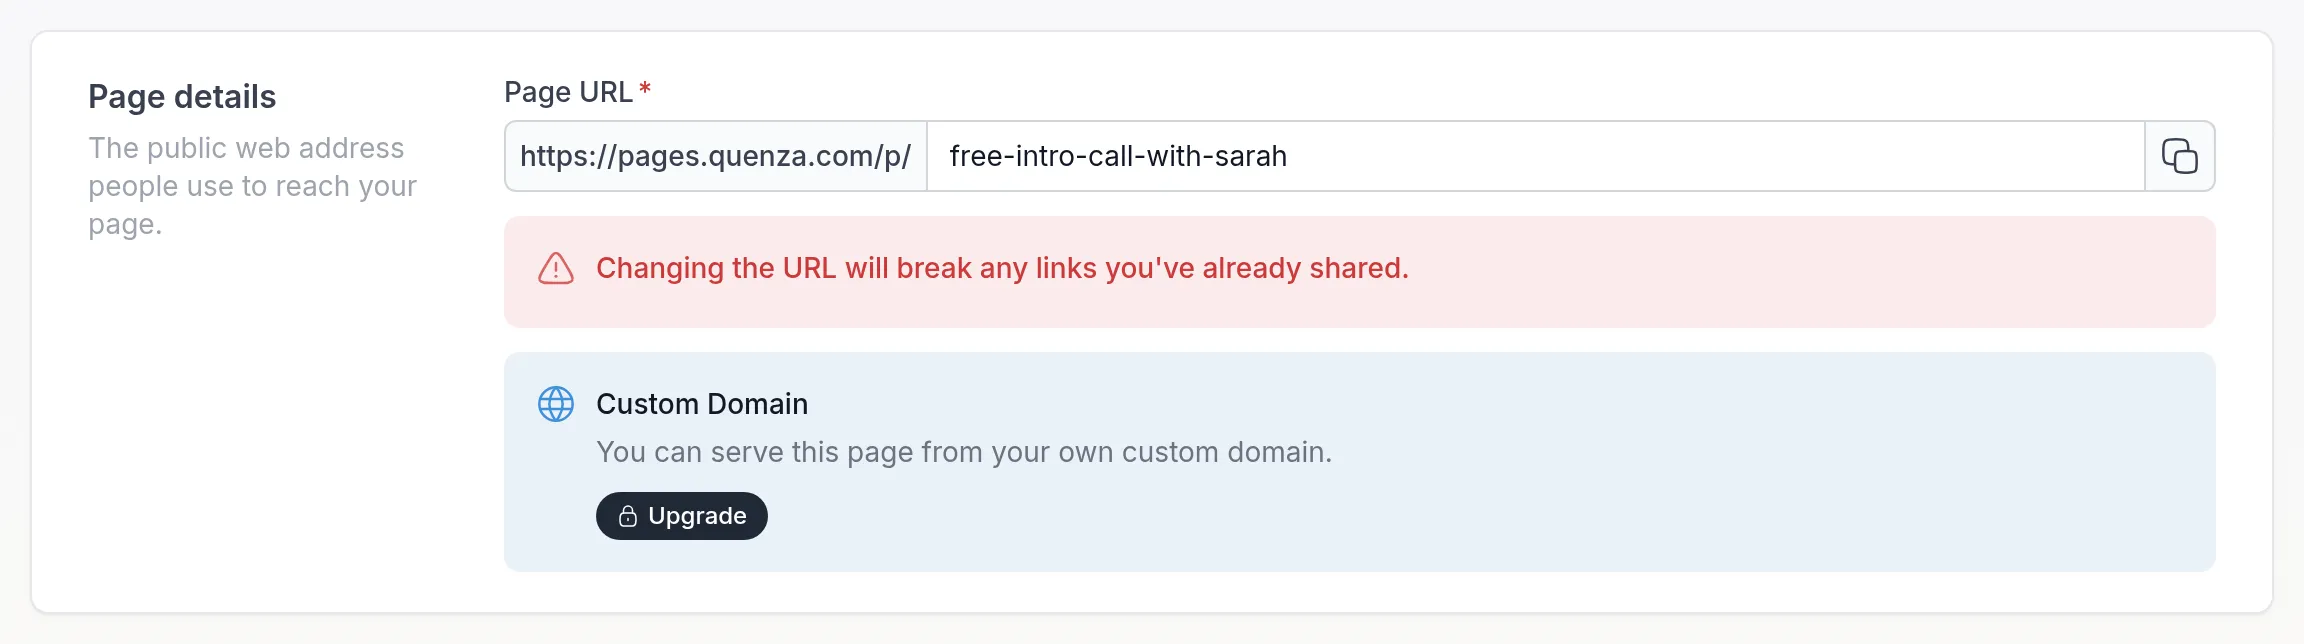
If your workspace has an active custom domain, the page is also available on your own domain. The Settings tab shows that address too. Custom domains are available on the Impact plan and higher.
Preview, save and publish
Section titled “Preview, save and publish”A new page is a draft. Visitors can’t see it until you publish it. The buttons are at the top right:
- Preview shows the page as visitors see it. In the preview, View live preview opens it in a new browser tab. The form in a preview doesn’t accept signups.
- Save saves your work without publishing.
- Publish saves the page and puts it live at its address.
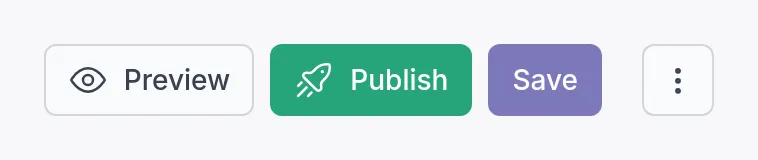
You need a page name and a page address before you can save.
Change a published page
Section titled “Change a published page”Changes to a published page stay private until you publish them, so visitors never see half-finished work. Make your changes and click Save changes. A dot on Publish changes shows you have saved changes that are not live yet. Click Publish changes and confirm to put them live.
Unpublish or delete a page
Section titled “Unpublish or delete a page”Open the page and click the ⋮ menu at the top right, or click the ⋯ menu next to the page on the Landing Pages list.
- Unpublish takes the page offline. The address stops working right away, but your content, signups and clients stay. You can publish the page again later, for example when the next group starts.
- Delete removes the page.
If your plan no longer includes landing pages, for example after you move to Spark, your pages are no longer available to visitors.
Related
Section titled “Related”Was this article helpful?
Thanks for letting us know.
Thank you. We read every answer and use it to improve this article.