
Manage clients
Add clients
Add a client to your workspace, choose how they use Quenza, and find your way around their client page.
Add each person you work with as a client. Then you can send them activities and programs and keep their notes, tasks and files in one place. You manage all of this under Clients in the left menu.
For example, after a first call with Priya Shah, Sarah Bennett adds her as a client and invites her to Quenza. Priya sets up her account from the email, and Sarah sends her the intake questionnaire to fill in before their first session.
Try Quenza with your demo client
Section titled “Try Quenza with your demo client”Every workspace starts with a demo clientDemo clientA client in your own name that only you can see. Send it your content to see exactly what your clients will see. in your own name, labelled Demo client. Use it to see what your clients see: send it an activity, then click View as client in the demo client’s ⋯ menu in your client list. The client app opens, already signed in as your demo client, and you can complete the activity there.
The demo client does not count towards your client limit, and you can keep it as long as you like. See View as client.
Add a client
Section titled “Add a client”Go to Clients and click + Client. In the Add client dialog, fill in:
- Profile picture: optional.
- First name, Last name and Email address.
- Language Settings: the language of the client app and of the emails the client receives. If your plan does not include multiple languages, this is English.
- Account creation: how the client will use Quenza (see below).
Click Add client.
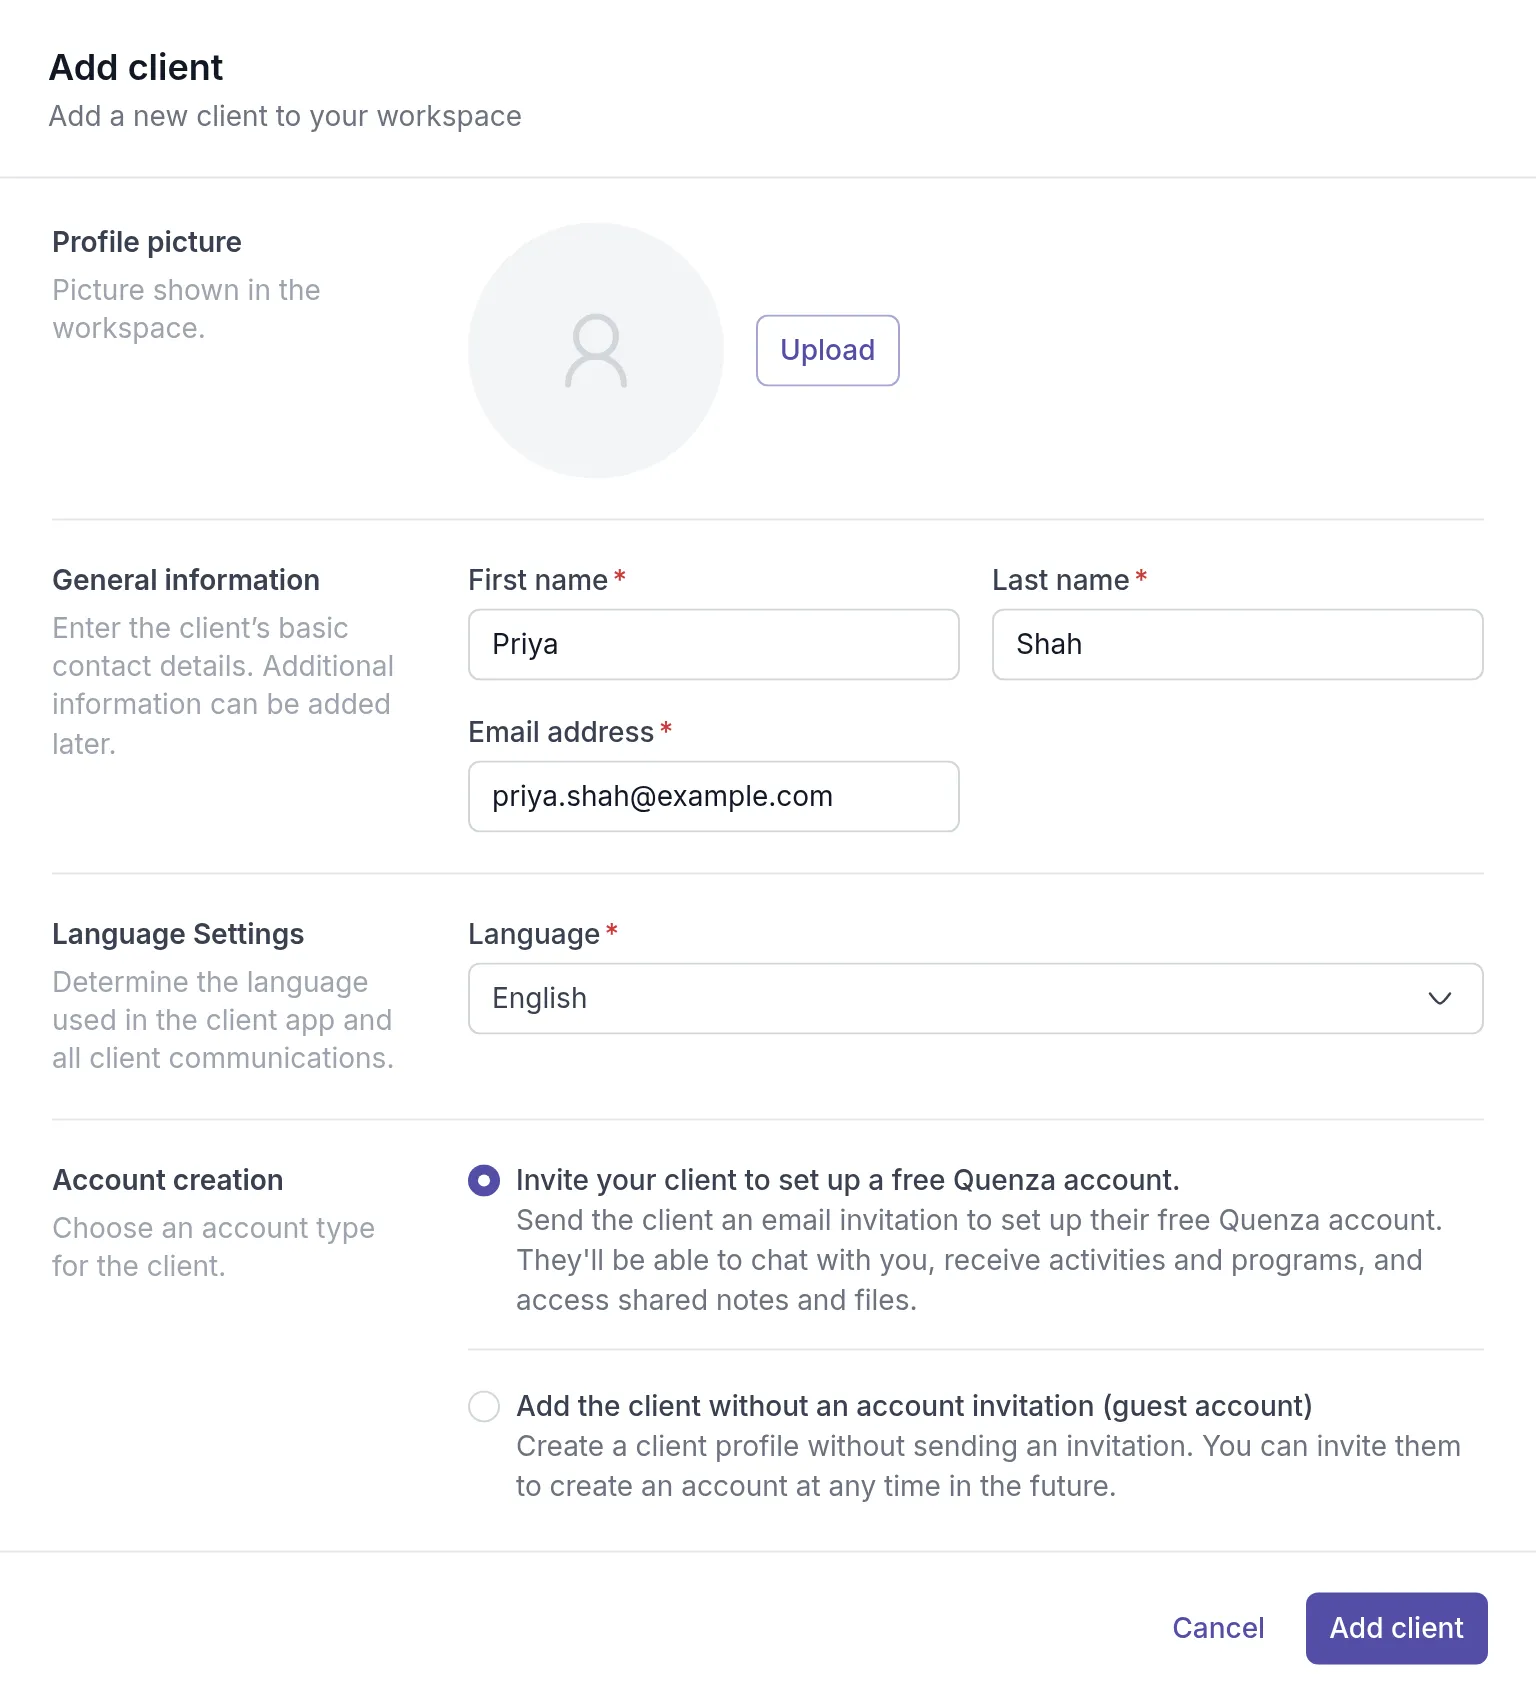
If you have reached your plan’s client limit, Quenza asks you to upgrade before you can add the client. See Client limits. To add many clients at once, see Import clients.
Choose an account type
Section titled “Choose an account type”- Invite your client to set up a free Quenza account. The client gets an email invitation to create their login. Once they have an account, they can chat with you, receive and complete activities and programs, and see the notes and files you share. Choose this for most clients.
- Add the client without an account invitation (guest account). The client gets no invitation and no login. Quenza still emails them at their own address when you send an activity or share a note, with a link that opens it without a password. This suits clients who don’t want an account or an app. Invite them later with Convert Guest to Account in the client’s ⋯ menu. See Guest clients.
If a client has not accepted their invitation yet, send it again with Resend Invitation in the same menu.
Give new clients a welcome kit
Section titled “Give new clients a welcome kit”The welcome kit puts three client guides on one page: accept the invitation, get the Quenza app, and find your way around the client portalClient portalThe website where your clients sign in to see their activities, programs, tasks, files and chats. The Quenza app shows the same.. It shows only the guides, without the Quenza help center around them. Send the link with your invitation, or click Print or save as PDF at the top and hand it out at the first session. The printout ends with a QR code that opens the guides online, with their videos.
To send a single guide instead, open it under Client app and use Share with a client at the top.
Find your way around a client’s page
Section titled “Find your way around a client’s page”Click a client in the list to open their page. The tabs at the top are Details, Activities, Programs, Tasks, Notes, Resources and Chat.
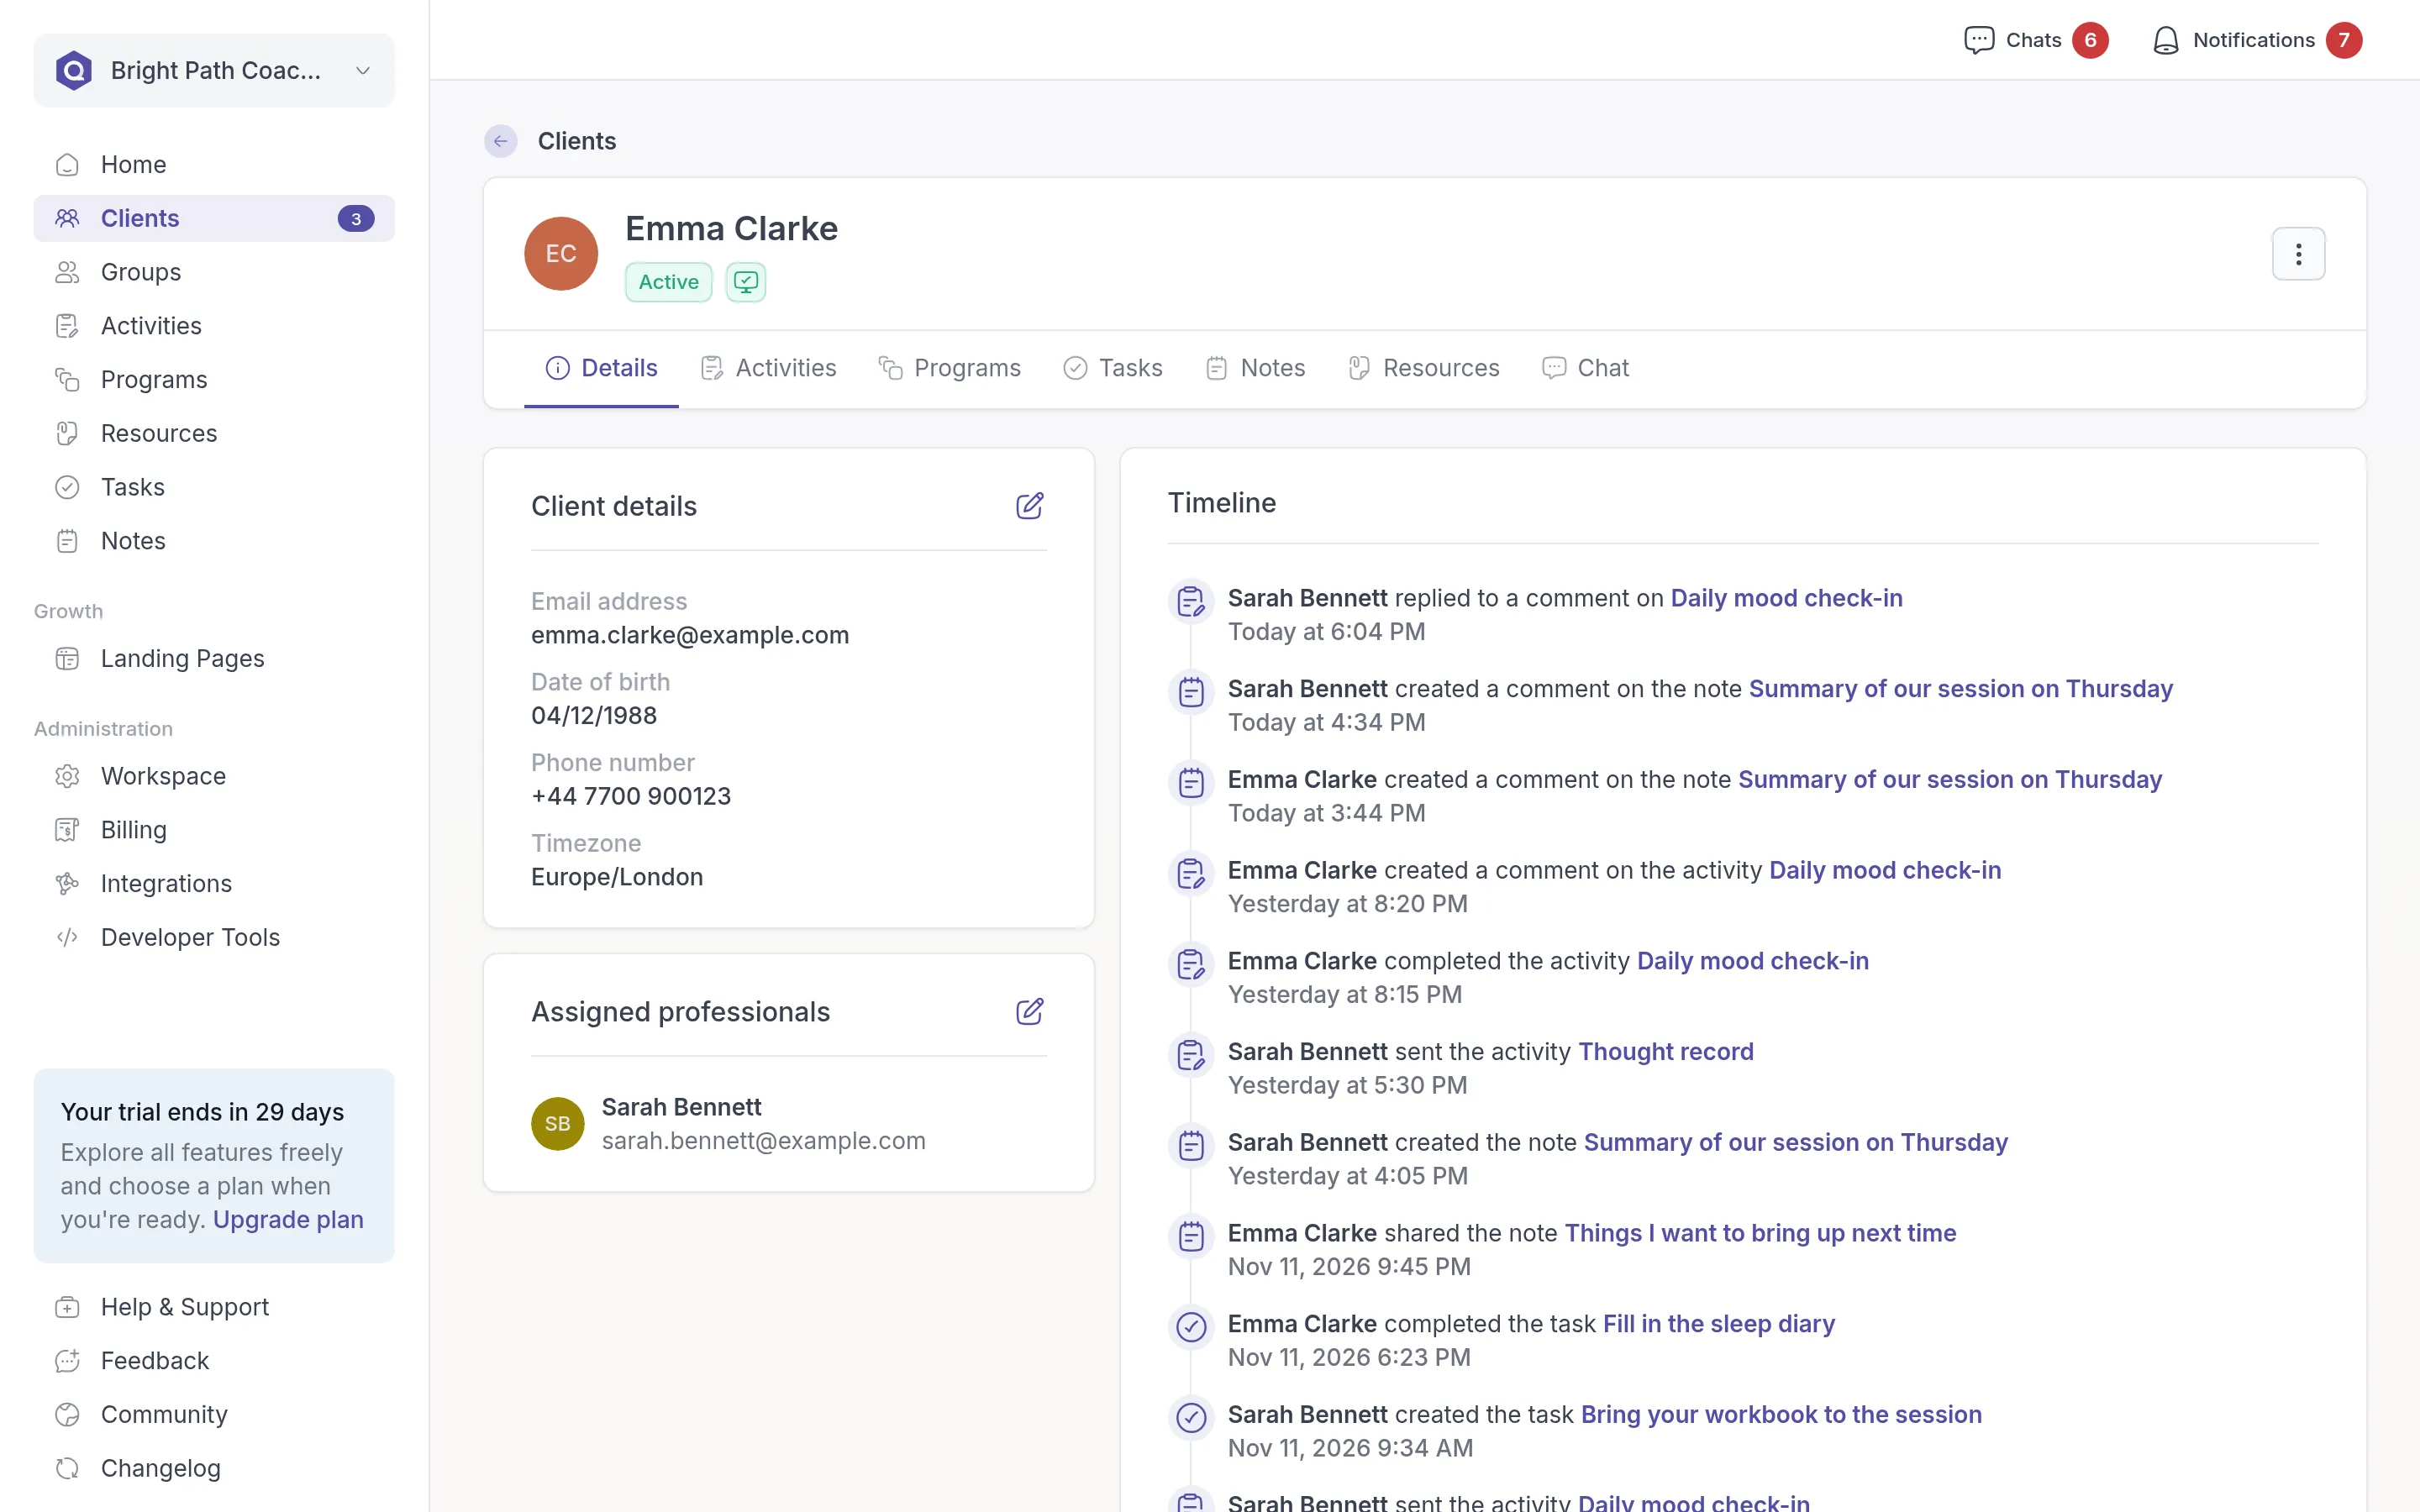
On the Details tab you see:
- Client details: contact details such as email address, date of birth, phone number and timezone. Click the edit icon to update them.
- Timeline: what has happened with this client, such as activities sent and completed, and when.
- Assigned professionals: the colleagues who work with this client. See Assign professionals.
The ⋯ menu at the top right of the page has the actions for this client, such as pausing their portal access, exporting their data, archiving and deleting them.
Find clients in your list
Section titled “Find clients in your list”Use the search field to find a client by name. Two filters narrow the list:
- All Clients: show everyone, only the clients assigned to you (Assigned to me), or the clients of one colleague.
- All statuses: show only Active, Pending or Archived clients. Pending clients have not accepted their invitation yet.
Was this article helpful?
Thanks for letting us know.
Thank you. We read every answer and use it to improve this article.